Precision fitting for
maximum performance
The correct installation of laminar rings is crucial for the sealing effect, function and service life of the entire system. Even the smallest deviations in fit, preload or installation space can affect performance – especially at high speeds, temperature fluctuations or tight tolerances.
Fey laminar rings are designed to be installed securely and to assume a defined, stable position after fitting. This page provides clear, practical instructions to help development engineers, fitters and maintenance technicians ensure optimum function.
Figure 1
The circumferential gap dimension (A) should be kept as small as possible in the design. The smaller the gap, the greater the labyrinth or sealing effect.
If radial play and/or tilting movements occur, please observe the information on the respective data sheets for the various ring arrangements under “Axial and/or radial play”!
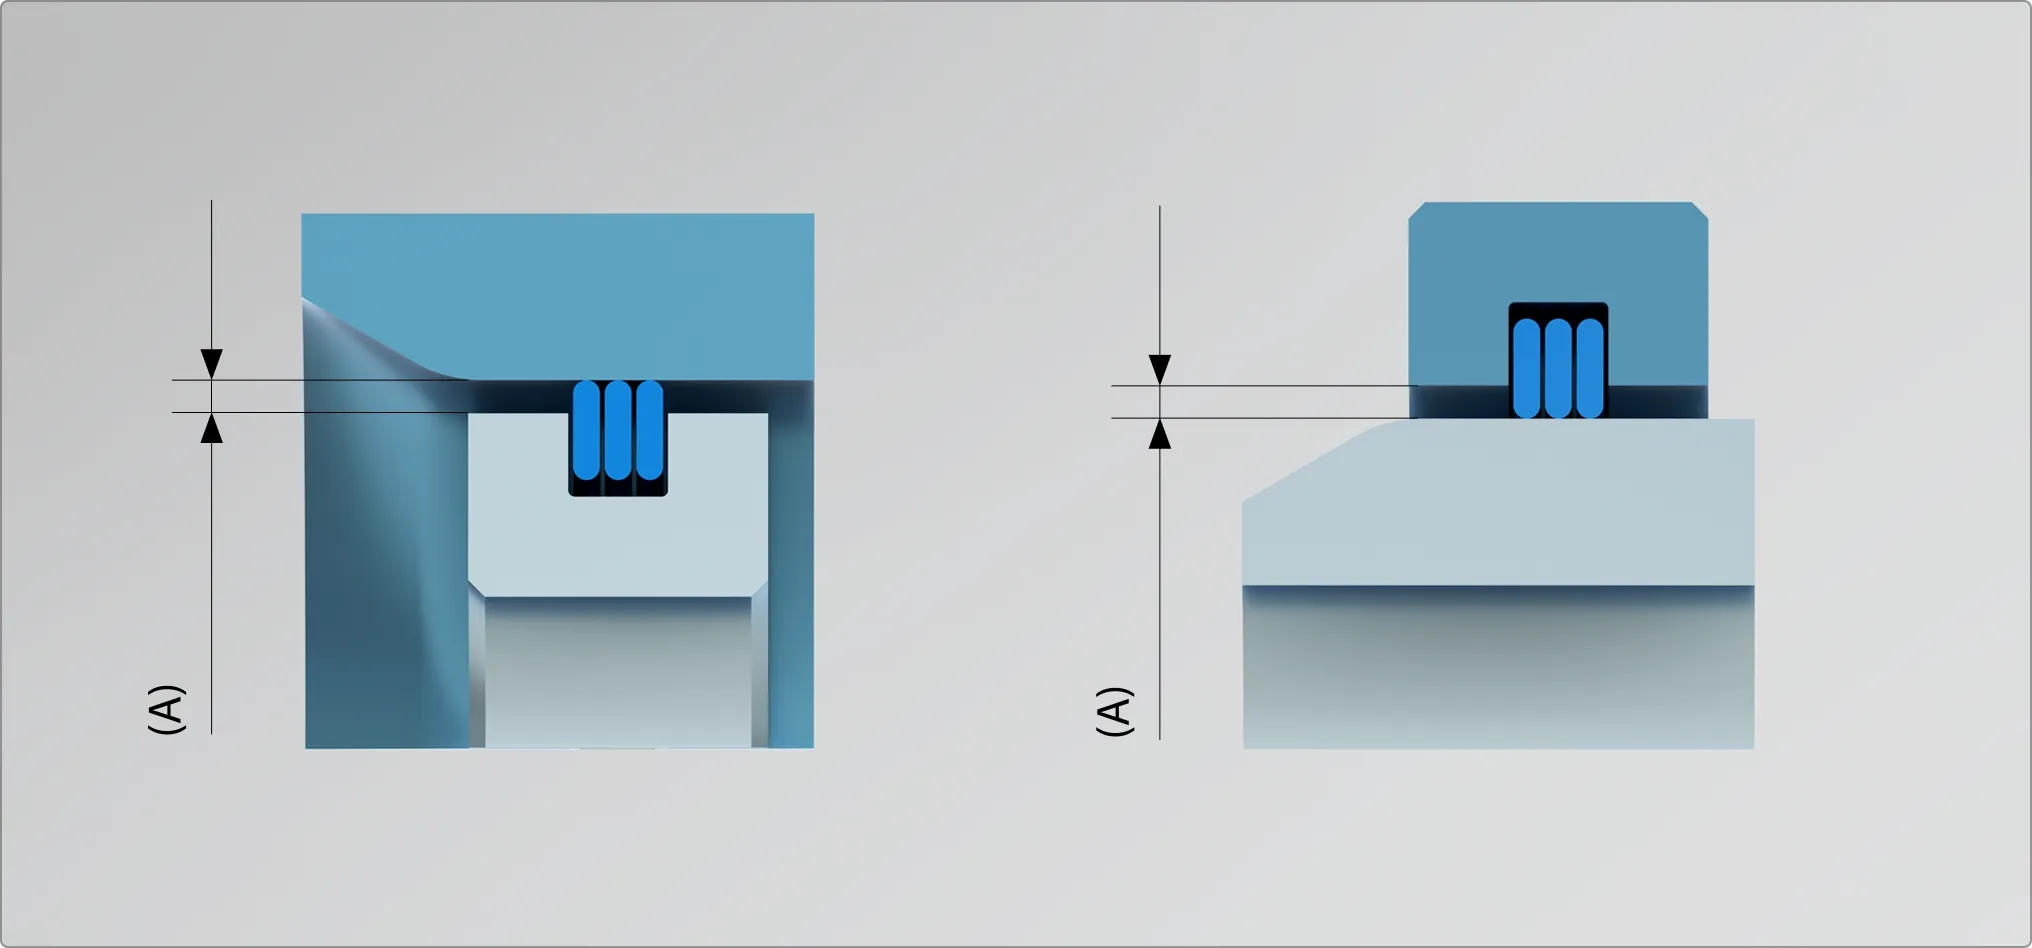
Figure 2
If prescribed fitting chamfers on the housing or shaft are not possible due to limited space, attachable tapered fitting sleeves or fitting strips should be used for housings and removable fitting cones should be used for shafts.
When assembling the parts fitted with rings, do not simply press them on, but also move them radially and tap them axially to overcome the slip resistance.
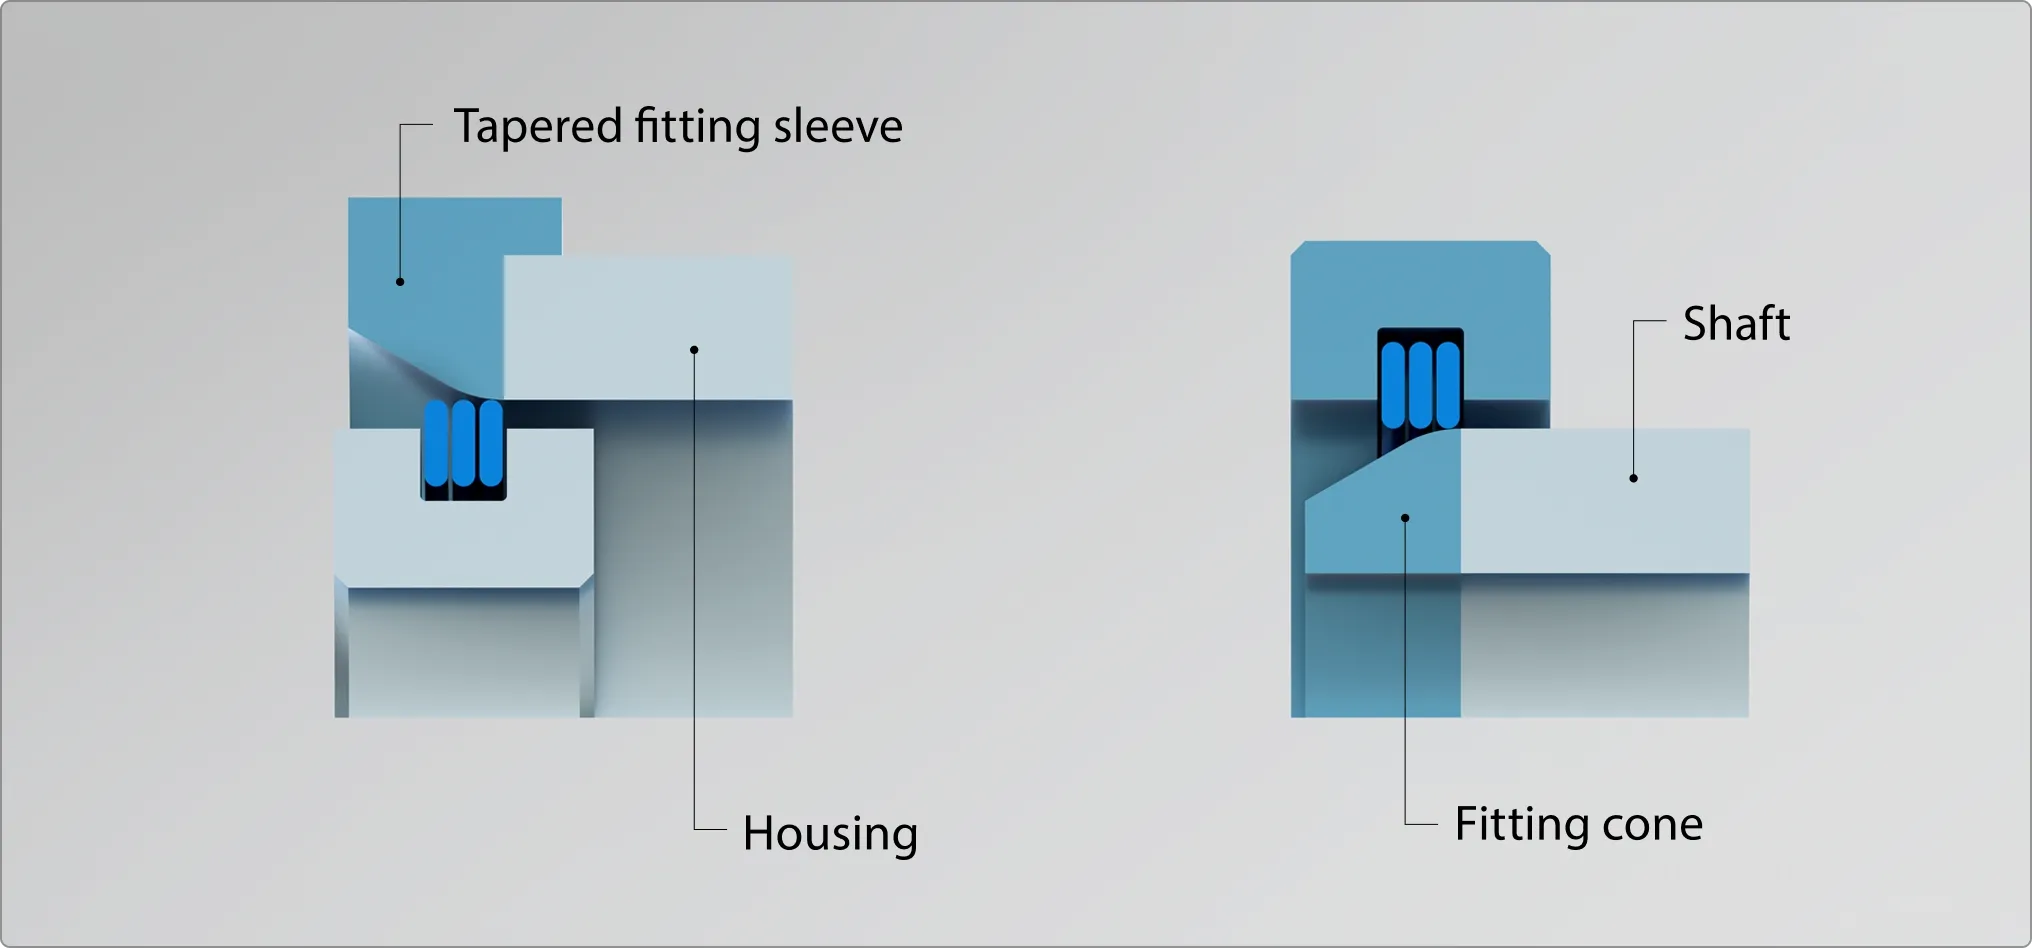
Figure 3
1) Single and double wound laminar rings are spiralled into the grooves by axial expansion of the rings.
2) If rings have to be fitted over a shaft into a groove, do not overstretch the rings radially as they will be permanently deformed!
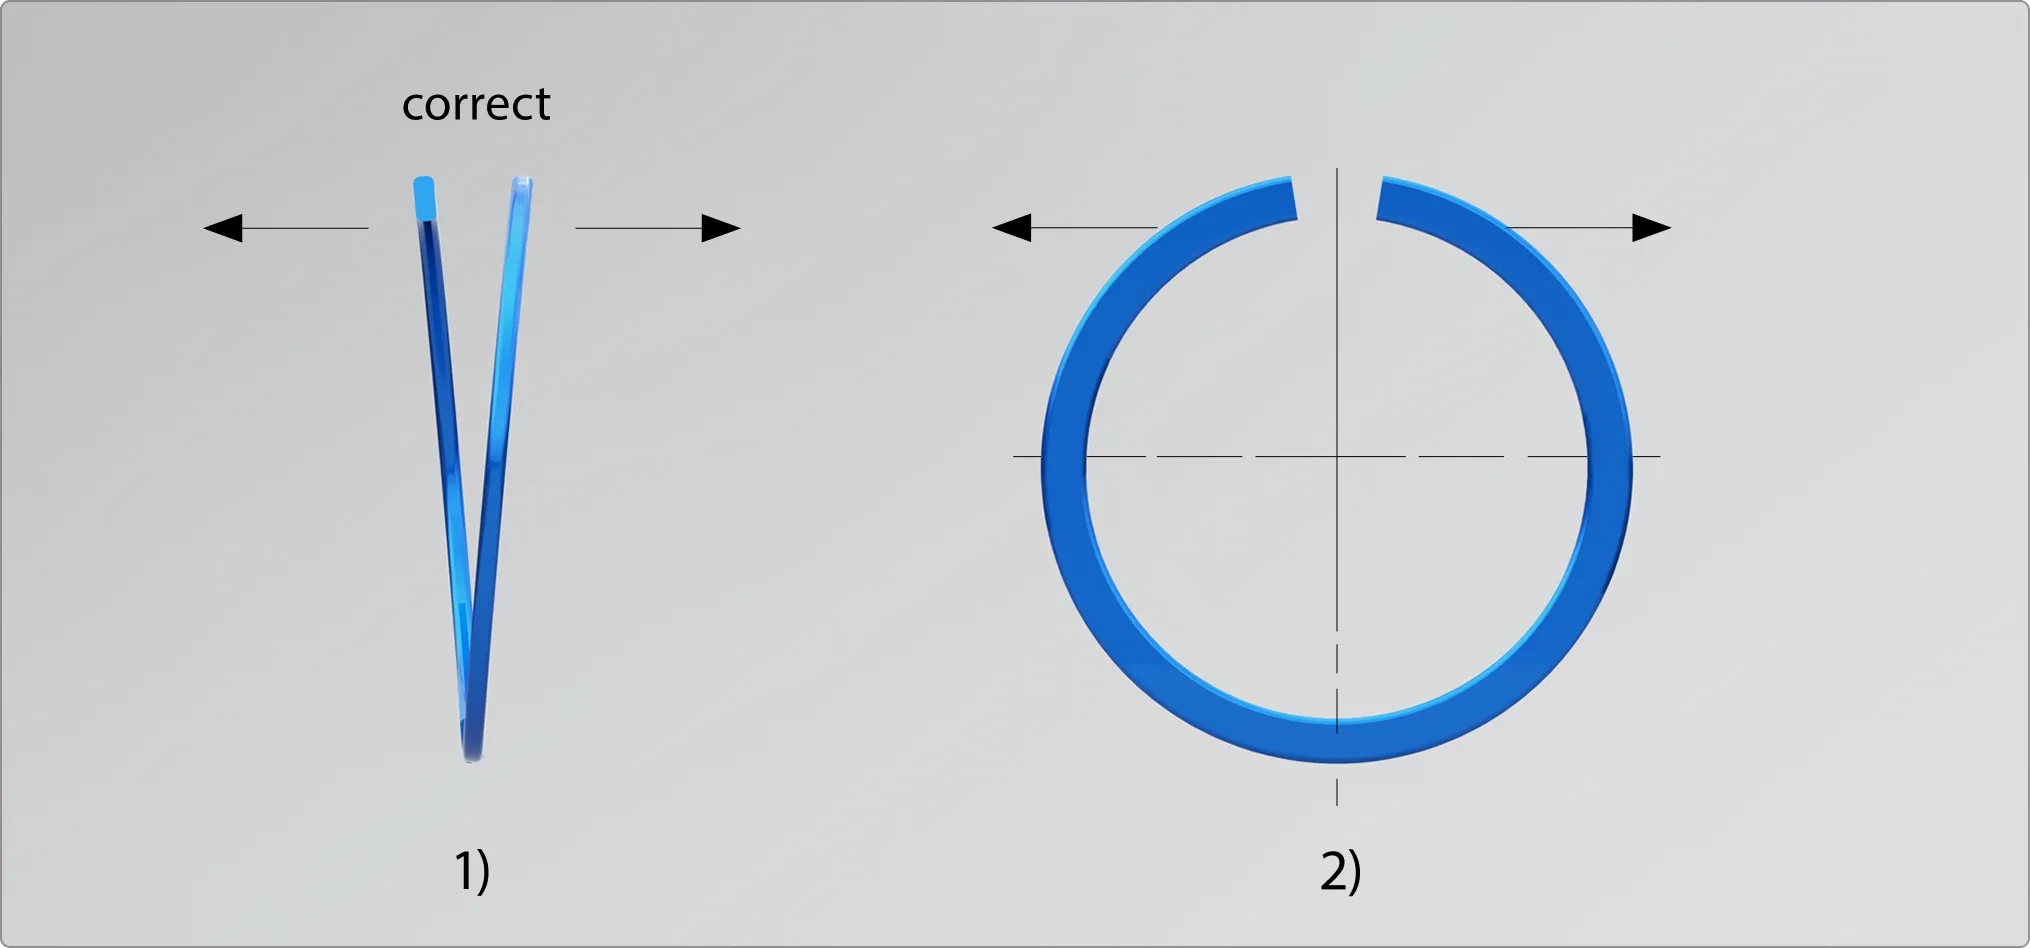
Figure 4
When spiralling the single wound laminar rings into the grooves, do not twist the ring ends into one another or entangle them!
When spiralling the double wound laminar rings into the grooves, do not slide the ring ends or windings over one another!
Please follow our fitting instructions L.00.138 (D/E)
Fitting instructions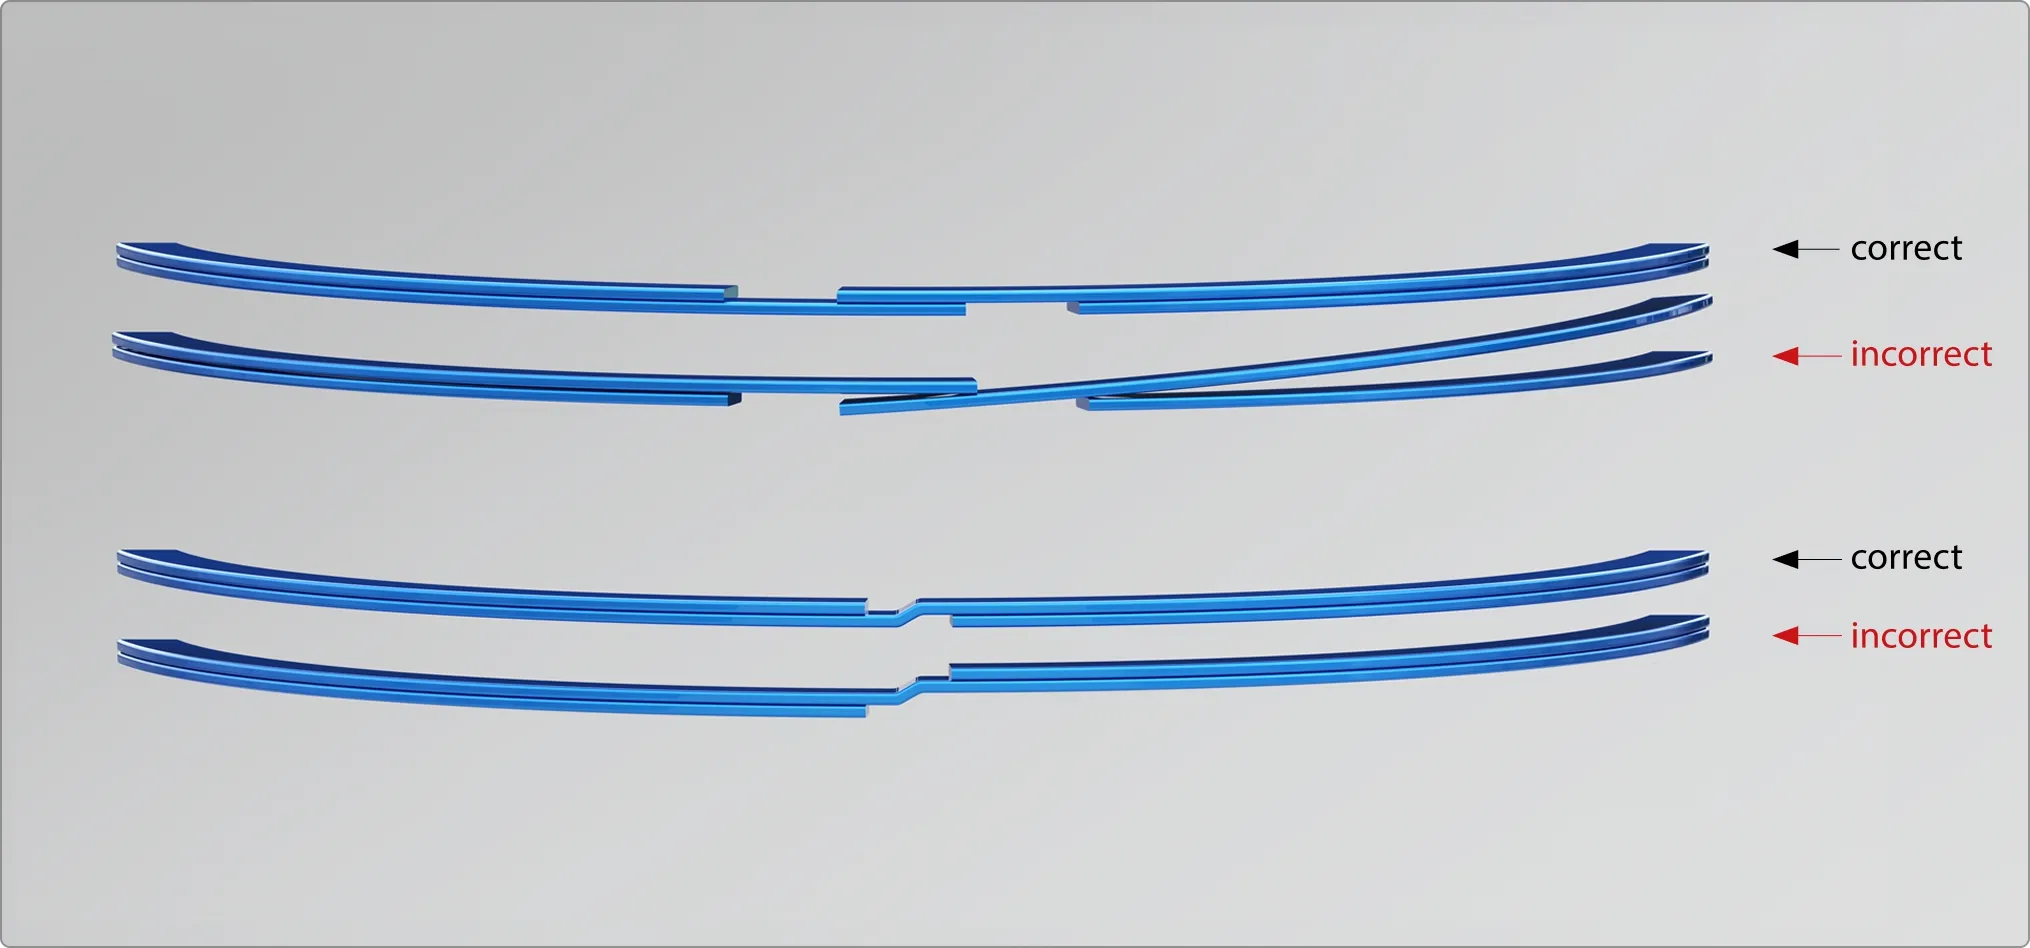
Figure 5
Fitting of inside and outside clamping laminar rings can be
carried out by hand as shown. Spread ring slightly axially
1) Insert one ring end into the groove.
2) Twist the rest of the ring in.
3) Check that the ring is securely held in the groove.
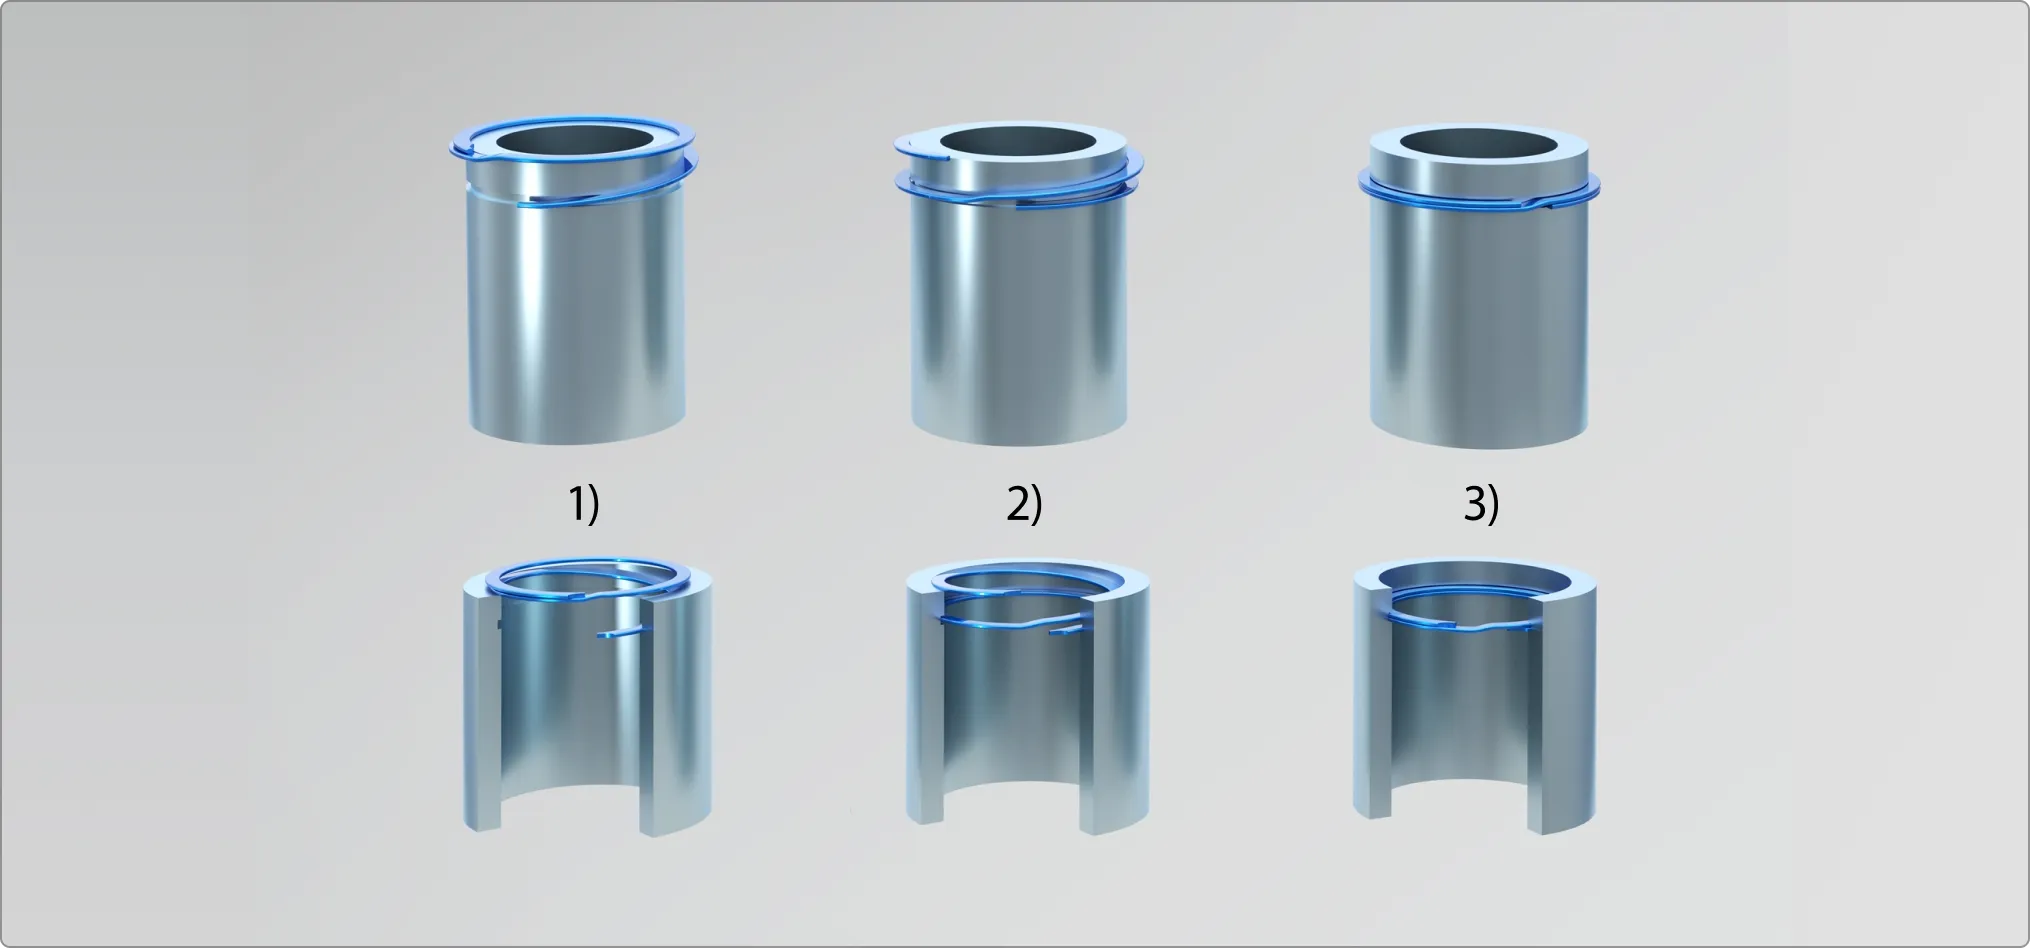
Figure 6
Instead of spiralling the retaining rings (for the shaft) by hand, they can be fitted using tools as shown in the illustrations.
1) Position the fitting cone and retaining ring.
2) Push the retaining ring over the fitting cone using the pressure sleeve.
3) Check that the ring is securely held in the groove.
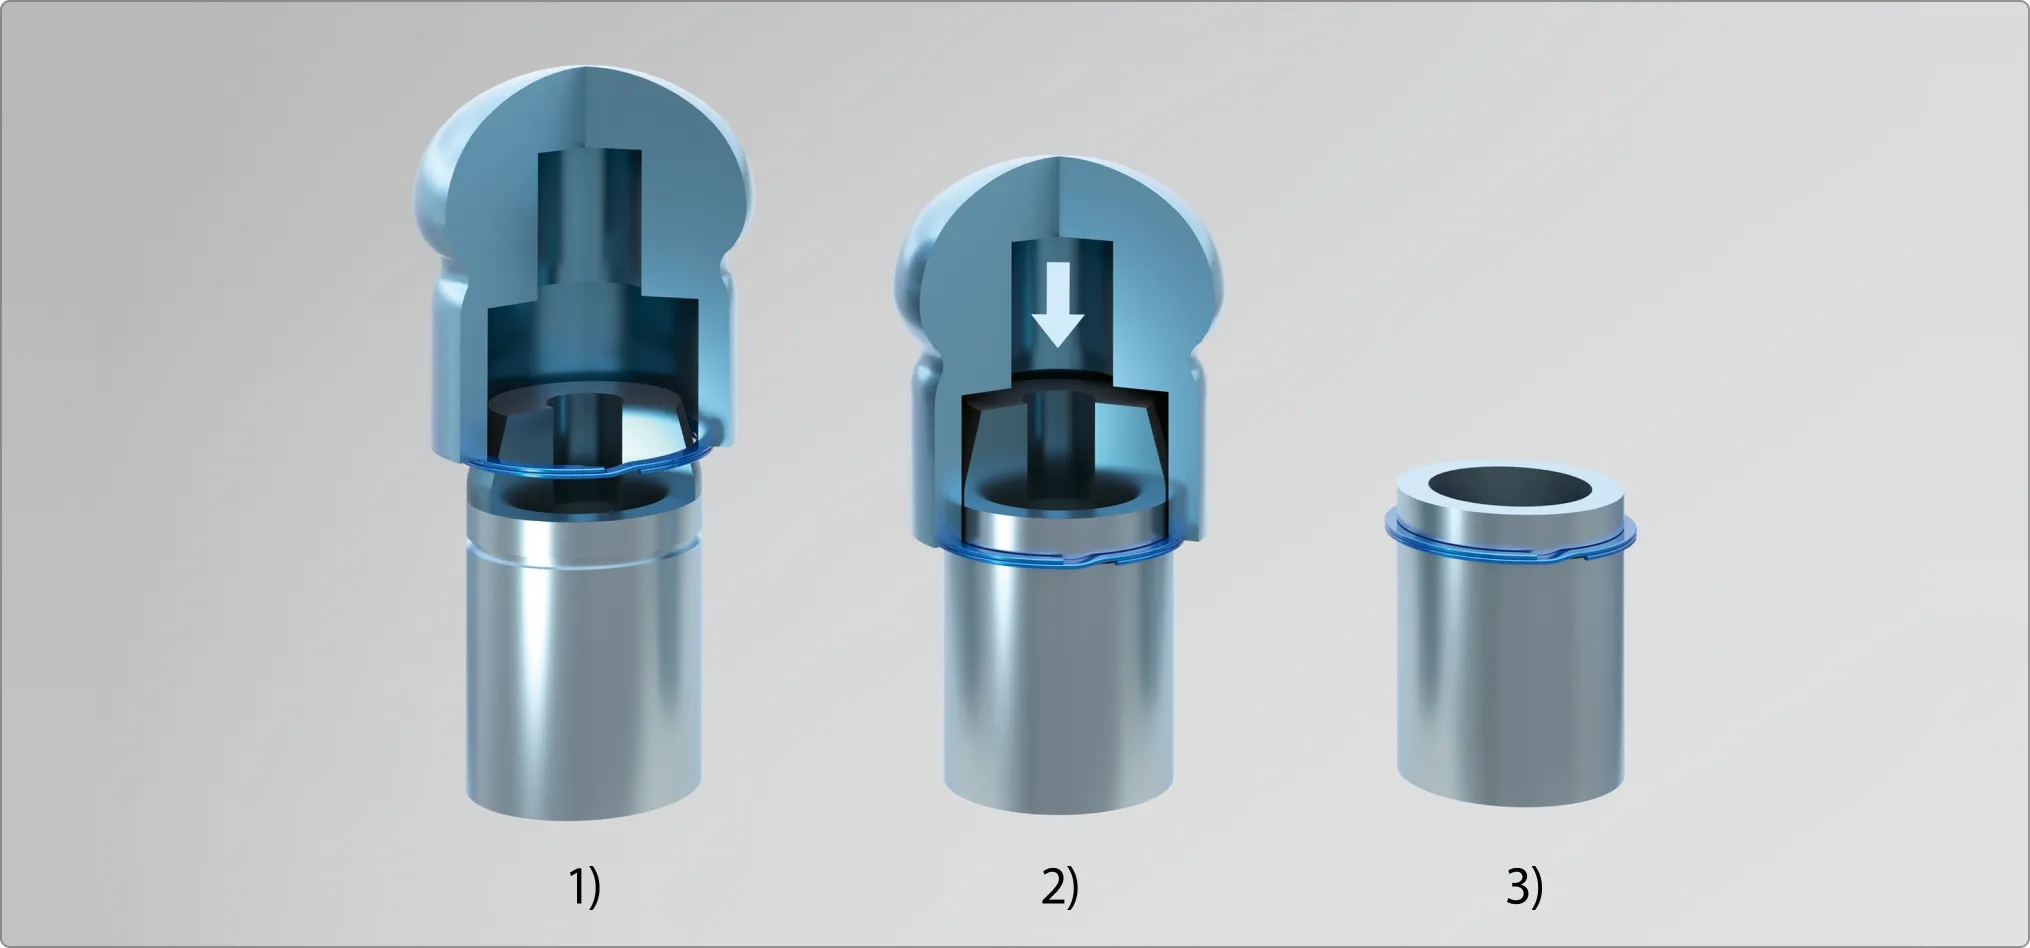
Figure 7
Instead of spiralling the retaining rings (for the bore) by hand, they can be fitted using tools as shown in the illustrations.
1) Position the fitting cone and retaining ring.
2) Push the retaining ring over the fitting cone using the pressure sleeve.
3) Check that the ring is securely held in the groove.
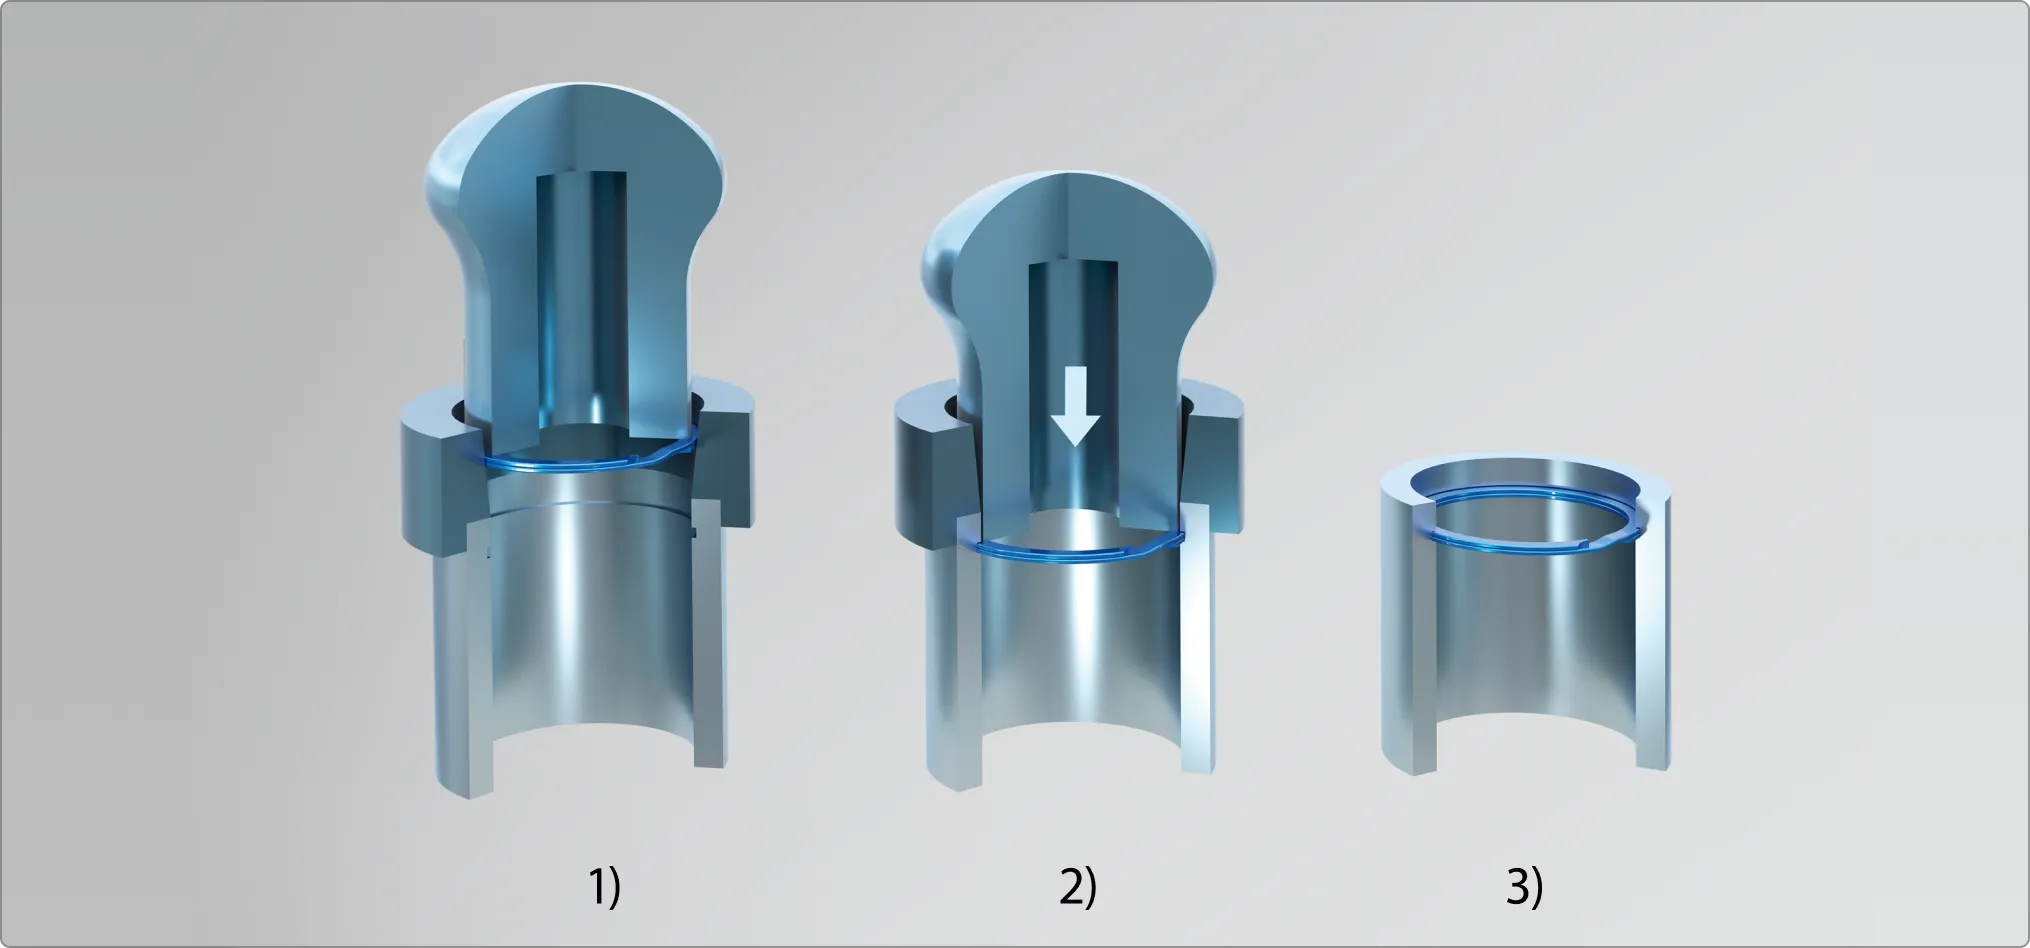
Figure 8
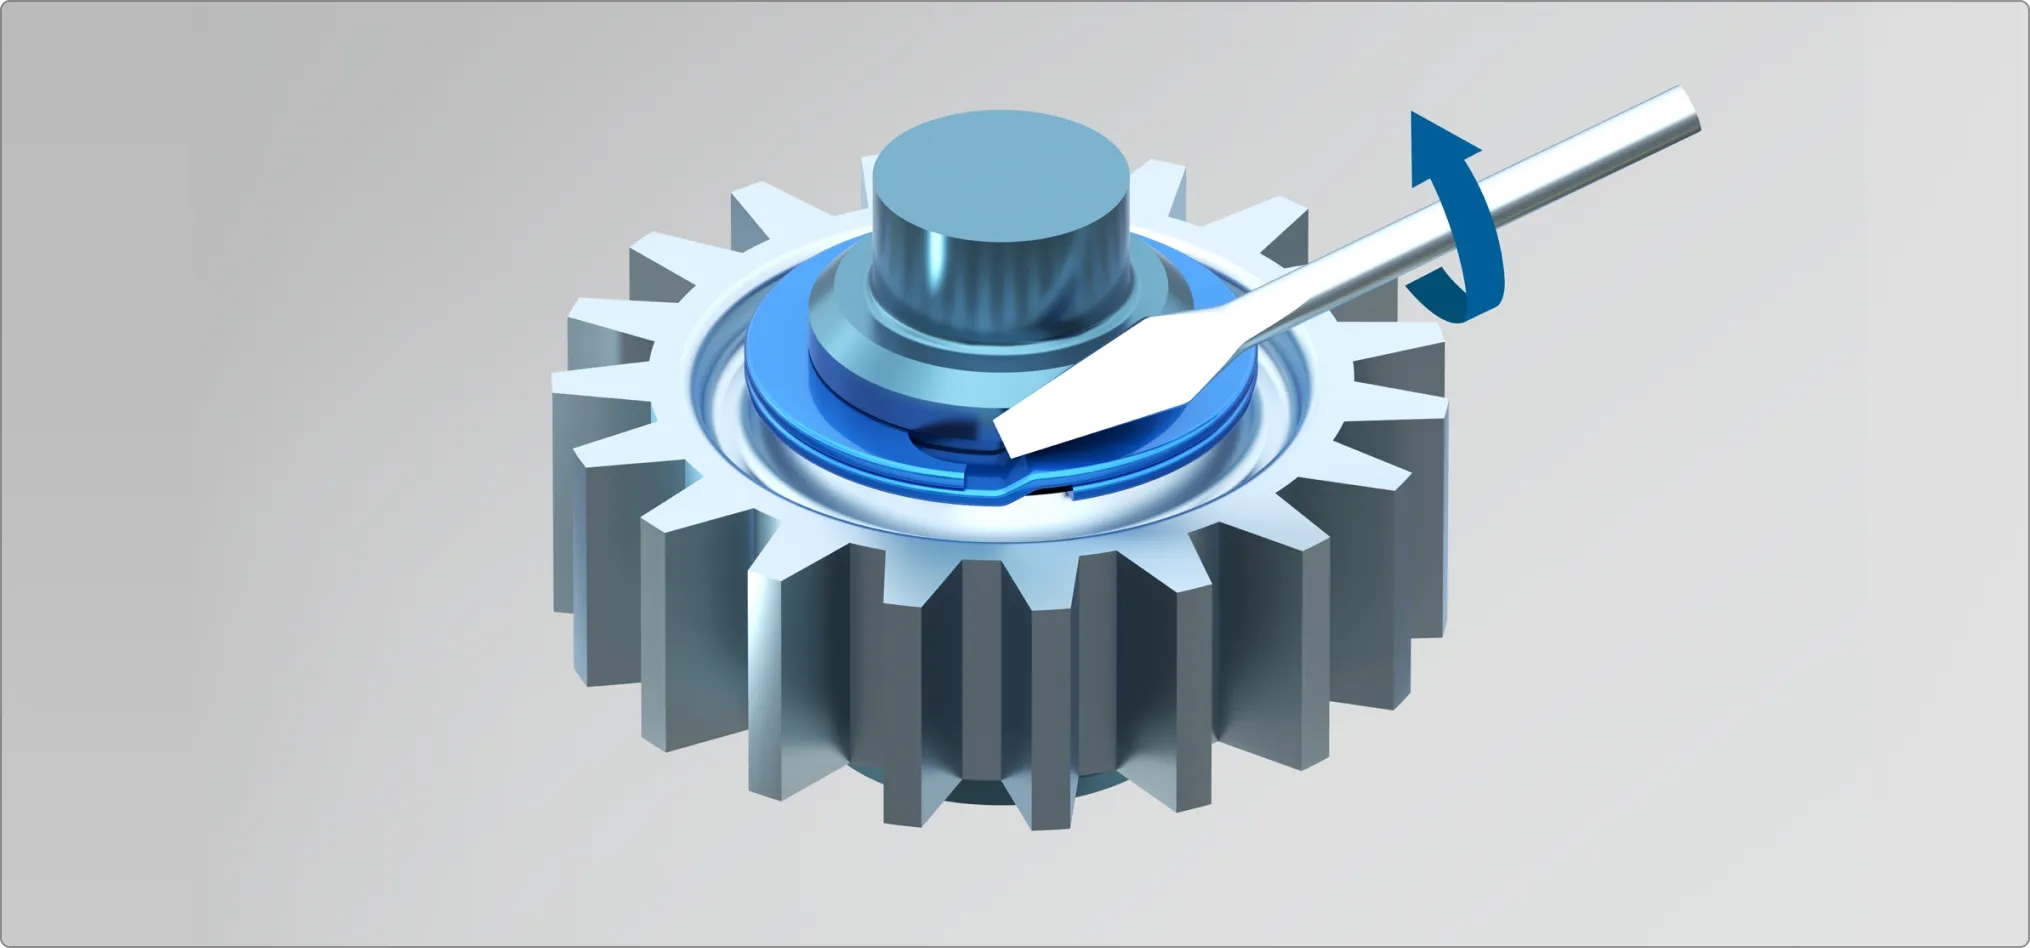
Remove the retaining rings using a slotted screwdriver. To do this, insert the screwdriver into the disassembly recess and lever one end of the retaining ring out of the groove with a slight twisting motion.
The ring is then removed from the groove in a spiral.